
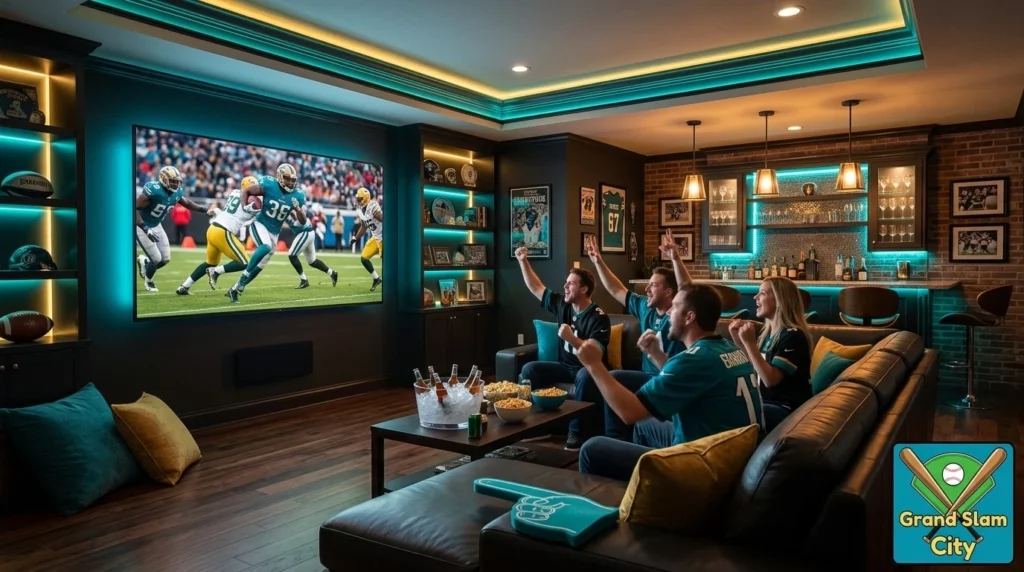
You dropped serious money on a 75-inch screen, a decent sound system, and a bar setup that would make your buddies jealous. Then game day arrives, and someone’s squinting at the screen because of a glare off the window, the bar area is dark enough that pouring a drink means doing it by feel, and the only light switch in the room is an overhead fixture that’s either blinding or off. The screen and the speakers get the budget. The lighting gets a single ceiling fixture left over from when the room was an office.
That’s backwards. Lighting isn’t a finishing touch you add after the furniture arrives. It’s the system that decides whether your man cave actually works the way you built it to work, from the pre-game setup to the final whistle.
Why Bad Lighting Ruins an Otherwise Great Setup
A single overhead light trying to do every job in the room is the most common mistake in man cave builds. It’s too harsh for watching the game, too weak for pouring drinks at the bar, and it throws reflections straight onto the screen the moment someone turns it on. One fixture, one brightness, one color temperature, no way to adjust for what’s actually happening in the room at that moment.
The result shows up in small annoyances that add up over a season. Guests squint during the fourth quarter because the room is too bright for the screen. Someone knocks over a bottle at the bar cart because there’s no light where the pouring actually happens. The highlight reel colors look washed out because the room’s ambient light is fighting with the screen instead of supporting it.
None of this is expensive to fix. It’s a planning problem, not a budget problem. A room lit in layers, each layer doing one job well, costs about the same as a room lit badly with one oversized fixture and a few plug-in lamps added as an afterthought. The difference is in how the layers are planned, not how much gets spent.
The Three Layers Every Game Day Room Needs: Ambient, Task, and Accent
Professional lighting design breaks every room into three layers, and a game day room needs all three working together rather than one layer trying to cover for the other two.
Ambient lighting is the general fill light for the room, the layer that lets people walk in, find a seat, and move around without bumping into the pool table. This is usually ceiling-mounted: recessed cans, a flush mount, or a track system. The key requirement for a game day room is that ambient light needs to dim low, ideally down to 10 percent or less, because during the actual broadcast you want this layer nearly off.
Task lighting covers the spots where people need to see what they’re doing: pouring a drink at the bar, grabbing wings off the snack table, finding the remote between couch cushions. This layer stays on a separate switch from ambient lighting because the need for it doesn’t go away just because the game started. Under-cabinet LED strips at the bar, a pendant over the snack station, or a simple lamp by the seating area all qualify.
Accent lighting is the layer that makes the room feel like a sports bar instead of a basement with a TV in it. Backlighting behind a jersey case, LED strips tracing the edge of the ceiling, color-changing bulbs in a corner lamp. This layer carries the team colors and the personality of the room, and it’s the one most guides skip entirely or mention as an afterthought.
The mistake most man caves make is installing only the ambient layer and calling it done. A room with just one bright ceiling fixture has no way to dim for the game without going completely dark, no dedicated light at the bar, and no personality once the overhead goes off. Three layers, each on its own switch or dimmer, is what lets the room shift from pre-game bright to game-time dim to halftime functional without anyone touching more than a switch plate.
If you haven’t settled on the overall room concept yet, it’s worth looking at Expert Tips For Creating A Sports-themed Man Cave before locking in fixture placement, since the layout decisions there will affect where each lighting layer actually goes.
Beating TV Glare Without Turning the Room Into a Cave
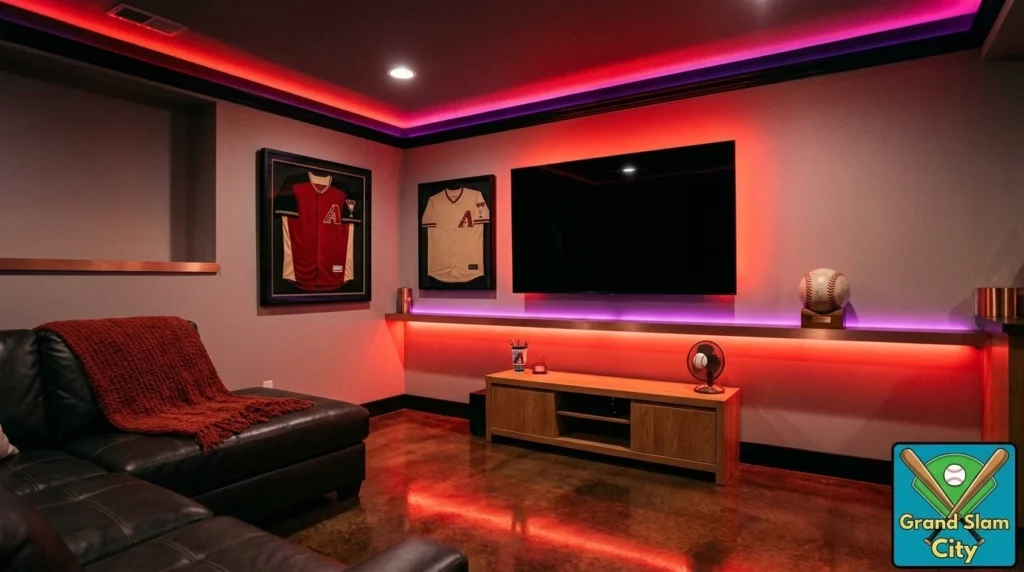
The instinct a lot of guys have is to just turn everything off when the game starts. That solves glare, but it creates a new problem: nobody can see their drink, their phone lights up like a flare every time someone checks a score, and walking to the bathroom becomes a hazard.
Glare on a screen comes from two sources: light hitting the screen directly, and light reflecting off a wall or window behind the viewer and bouncing back. The fix for direct light is positioning. Any fixture that sits in a direct line between a light source and the screen’s surface needs to be dimmed or turned off during the broadcast. This is usually the ambient ceiling layer, and it’s exactly why that layer needs to dim low rather than just switch on or off.
The fix for reflected glare is bias lighting, a technique borrowed from film editing bays and increasingly common in home theaters. A bias light is a thin LED strip mounted on the wall directly behind the TV, usually at a low, neutral white or a soft warm tone, pointed at the wall rather than at the viewer. It doesn’t light the room. It lights the immediate area around the screen, which reduces the contrast between the bright screen and the dark space around it. Less contrast means less eye strain and a picture that reads as sharper even though nothing about the TV itself changed.
Bias lighting strips are inexpensive, and most stick-on LED kits include one in the box. If yours doesn’t, a basic white LED strip behind the TV, dimmed low, does the same job.
Beyond the TV itself, consider where windows sit relative to the screen. A window directly across from or beside the screen is going to be the biggest glare source in the room regardless of what you do with lamps. Blackout curtains or cellular shades solve this permanently and are worth the investment if the room has any natural light at all. A day game in October hits different when the room still has usable screen contrast at 1pm.
Team Colors and Smart LEDs: Lighting That Reacts to the Score
This is where a man cave starts to look like it belongs to someone who actually planned it rather than someone who grabbed whatever lamp was in the garage.
Smart LED strips and bulbs, the kind controlled by an app or voice assistant, have made color-changing accent lighting cheap and genuinely easy to install. Most run on adhesive backing, plug into a standard outlet, and set up in under twenty minutes. The appeal for a sports room is obvious: strip lights behind the TV or along a shelf can be set to your team’s exact colors, and many systems let you save that combination as a preset you trigger with one tap.
A few setups worth considering, depending on how far you want to take it:
Behind-TV accent strips in team colors, visible as a glow around the screen’s edges without interfering with picture quality
Shelf or trophy case lighting behind helmets, jerseys, or signed memorabilia, which also solves a practical problem since display pieces are hard to appreciate in a dim room without their own light source
Ceiling-perimeter LED strips that wash the top of the walls in color, giving the whole room a tint without raising the overall brightness enough to wash out the screen
Smart bulbs in existing lamps, swapped in for standard bulbs, which is the cheapest entry point since no new wiring or strip installation is needed at all
Some of the higher-end smart lighting systems now sync with apps that respond to sound or, in some cases, to a connected smart home routine triggered manually, flashing or shifting color when you trigger it yourself after a score. Whether a system reacts automatically to game data depends entirely on the specific product and the apps it supports, so check the actual feature list before assuming a bulb or strip will “know” when your team scores. Most of what you see in flashy setup videos is the owner triggering a scene manually at the moment of a touchdown, not the lights reading the game feed on their own.
If memorabilia display is part of the plan, an Ultimate Collectors Showcase Man Cave Displays We Love is worth a look for ideas on cases and shelving that pair well with this kind of backlighting.
Lighting the Bar Cart, Seating, and Snack Station So Nobody’s Fumbling
The bar is where lighting failures become physical problems rather than just aesthetic ones. Pouring a drink in the dark means spills. Reading a label in dim light means someone grabs the wrong bottle. A snack table nobody can see clearly turns into a mess of dropped chips and sticky countertops.
The bar cart or home bar needs its own dedicated task light, separate from the room’s ambient dimmer. Under-cabinet LED strips mounted beneath any overhead shelving give direct, even light on the pouring surface without glaring into anyone’s eyes. If the bar has open shelving for bottles, small puck lights or a strip along the back of the shelf both light the bottles for browsing and add a bit of accent glow even when the main lights are down. A single pendant light directly over the bar surface works too, and has the advantage of being a visual anchor that signals “this is the bar” even from across the room.
Seating areas benefit from low-level lighting that doesn’t compete with the screen. Floor lamps with dimmable bulbs placed beside recliners or at the end of a sectional let people see their own drink or phone without throwing light toward the TV. LED strip lighting run underneath a sofa or media console, pointed down and out, creates a soft glow along the floor that helps people navigate the room without needing the overhead on at all. This “toe-kick” style lighting is borrowed from kitchen design but works just as well in a dark living space.
The snack station, whether it’s a dedicated table, a kitchenette, or just a counter near the bar, needs enough direct light for people to actually see what they’re grabbing and to avoid the mess that comes with guessing in the dark. A simple pendant or a couple of puck lights mounted to the underside of a cabinet handles this without needing to be bright enough to affect the rest of the room.
The common thread across all three of these areas is the same: a separate, dedicated circuit or switch from the ambient ceiling lights. If the bar light is wired to the same dimmer as the main ceiling fixture, you lose the ability to keep the bar usable while the rest of the room goes dark for the game, which defeats the entire point of layering the lighting in the first place.
One Switch, Five Moods: Setting Up Scenes From Pre-Game to Overtime
Once the three layers are installed and wired to separate switches or dimmers, the next step is deciding what combination of settings each moment in game day actually calls for. This is where smart dimmers and smart switches pay for themselves, because instead of manually adjusting four or five different fixtures every time the mood needs to shift, one tap or one voice command sets all of them at once.
A reasonable set of scenes for a game day room looks something like this:
Pre-game: Ambient lighting at full or near-full brightness, task lighting on, accent lighting on in team colors. This is the setup phase; people are arriving, finding seats, getting drinks, and full visibility matters more than mood.
Kickoff: Ambient lighting dimmed to near zero, task lighting dimmed low but still functional at the bar and seating areas, accent lighting on low to provide just enough glow that the room doesn’t feel like a cave while screen contrast stays high.
Halftime: Ambient lighting back up to a medium level, task lighting at full, accent lighting steady. This is a working light level; people are up refilling drinks and snacks and need to actually see.
Overtime or a close finish: Similar to kickoff but even dimmer, ambient fully off, accent lighting optionally shifted to a more dramatic or intense color setting if the system supports it, since this is the moment nobody’s leaving their seat anyway.
Post-game: Full ambient brightness back on, everything bright and functional, signaling the shift from game mode back to regular hangout mode as people wind down or head out.
Setting these up as saved scenes on a smart switch or smart bulb app means the whole transition happens with one tap on a phone or one voice command, rather than someone walking around the room adjusting four separate dimmers while trying not to miss a replay. Most smart lighting ecosystems, whatever brand you land on, support this kind of scene-saving as a standard feature, so it’s worth checking for it specifically when comparing products rather than assuming every smart bulb will have it.
For anyone not ready to invest in a full smart system, a simpler version of this still works: label a set of standard dimmer switches clearly, and get in the habit of a consistent routine for each phase of game day. It’s less seamless, but it delivers the same functional result, which is a room that changes with the moment instead of staying locked on one setting all day.
Fixtures Worth Paying More Than Where to Save
Lighting budgets, like everything else in a man cave build, work better when the money goes toward the fixtures that affect daily use rather than the ones that just look good in a photo.
Worth paying more for:
Smart dimmer switches for the ambient layer. A cheap non-dimmable switch locks you into one brightness level permanently, which undermines the entire point of layered lighting. A quality dimmer, smart or manual, is one of the highest-impact purchases in the whole lighting plan.
Bias lighting behind the TV, specifically one with a good, consistent white or warm white tone rather than the cheapest strip available. This fixture does the most to protect picture quality, and a strip with inconsistent color temperature can actually make the screen look worse, not better.
Task lighting at the bar, since this is a functional safety and usability item, not a decorative one. A dim, poorly placed bar light leads to spills and mistakes every time people use it.
Fine to save on:
Accent LED strips for color and mood, where budget options from reputable but inexpensive brands perform almost identically to premium versions for a fraction of the price. The difference between a $20 strip and a $60 strip is usually app polish and a few extra features, not visible light quality.
Decorative lamps and fixtures that exist mostly for style, like a floor lamp chosen to match the room’s look. These can be swapped out cheaply later if the style changes, so there’s no reason to overspend here upfront.
Smart bulbs for secondary fixtures, like a lamp in the corner that’s rarely the focal point. Mid-range smart bulbs handle color and dimming fine for anything that isn’t a primary light source.
The general rule: spend on anything that affects function every single time the room is used- the dimmer switches, the bar task light, the bias lighting. Save on anything that’s primarily decorative, since those are easy and cheap to upgrade later without touching wiring or fixtures.
Lighting is one piece of a much larger build, and it works best once you’ve got a clear picture of the rest of the room, from seating to the bar setup to display cases. The Ultimate Mancave Checklist Over 30 Awesome Ideas is a solid next stop for mapping out everything else the room needs once the lighting plan is locked in.